十八親和銀行 Easybiz専用コンバーター

Easybiz、結構いい感じなのですが、DXというにはまだちょっと固い感じがします。
ということでEasybizをハブとして弥生・振込インポート用ファイルを作成するGUIを作りました。
Easybizから作成した取引先ファイルをインポートし、それを使って弥生会計への仕訳インポートファイル・Easybizの仕入へのインポートファイルを作成するソフトです。
詳しい使い方はリンク先のReadMeに書きました。
個人的には基本機能としてこういったエクスポート用ファイルの作成までして頂けるとすごい楽になると思うのですが、
各ソフトの使い方にまで精通していなければならず、より横断的な知識が必要となる領域にまでは銀行は踏み込まないのかな、
と思いました。ソフト自体もベンダーからのOEMっぽい形ですし。
サーバー変更につきraspotify→spoconに変更した。

[2023/05/27追記]
spotifyの認証周りが変更されたので、librespotのバージョンを確認する必要があります。
こちらからlibrespot-api-1.6.3.jarをダウンロードし、
opt/spocon/llibrespot-java-api-v1.6.2.jarを削除し、librespot-api-1.6.3.jarをlibrespot-java-api-v1.6.2.jarと同名に書き換えた後、spoconを再起動する必要があります。
音楽サーバーをラズパイからheroboxに変更した。
raspotifyが少し不安定になりそうだったのでspoconに変更した。
基本的なインストール方法、運用方法はraspotifyと同じなのだが、設定は opt/spocon/conig.toml にて行うようになっている。
config.tomlはこんな感じ
### Device type (COMPUTER, TABLET, SMARTPHONE, SPEAKER, TV, AVR, STB, AUDIO_DONGLE, GAME_CONSOLE, CAST_VIDEO, CAST_AUDIO, AUTOMOBILE, WEARABLE, UNKNOWN_SPOTIFY, CAR_THING, UNKNOWN) ###
deviceType = "AUDIO_DONGLE"
### Device name ###
deviceName = "【ここに名前】"
### Device ID (40 chars, leave empty for random)  ###
deviceId = ""
### Log level (OFF, FATAL, ERROR, WARN, INFO, DEBUG, TRACE, ALL) ###
logLevel = "TRACE"
### Preferred locale ###
preferredLocale = "en"

### Cache ###
[cache]
    dir = "./cache/"
    # Cache enabled
    enabled = true
    doCleanUp = true

### Authentication ###
[auth]
    # Credentials file (JSON)
    credentialsFile = ""
    # Spotify password (USER_PASS only)
    password = "【ここにパスワード】"
    # Spotify authentication blob Base64-encoded (BLOB only)
    blob = ""
    # Whether to store reusable credentials on disk (not a plain password)
    storeCredentials = false
    # Strategy (USER_PASS, ZEROCONF, BLOB, FACEBOOK, STORED)
    strategy = "USER_PASS"
    # Spotify username (BLOB, USER_PASS only)
    username = "【ここにユーザー名】"

### Preload ###
[preload]
    # Preload enabled
    enabled = true

### Network ###
[network]
    # If ping isn't received within this amount of seconds, reconnect
    connectionTimeout = 10

### Proxy ###
[proxy]
    # Basic auth password
    password = ""
    # The proxy hostname
    address = ""
    # The proxy port
    port = 0
    # Whether authentication is enabled on the server
    auth = false
    # The proxy type (HTTP, SOCKS)
    type = "HTTP"
    # Connect to proxy using SSL (HTTP only)
    ssl = false
    # Whether the proxy is enabled
    enabled = false
    # Basic auth username
    username = ""

### Zeroconf ###
[zeroconf]
    # Listen on all interfaces (overrides `zeroconf.interfaces`)
    listenAll = true
    # Listen on these interfaces (comma separated list of names)
    interfaces = ""
    # Listen on this TCP port (`-1` for random)
    listenPort = 1704

### Shell ###
[shell]
    onTrackSeeked = ""
    onStartedLoading = ""
    onConnectionDropped = ""
    onMetadataAvailable = ""
    onTrackChanged = ""
    onPanicState = ""
    onFinishedLoading = ""
    # Shell events enabled
    enabled = false
    onPlaybackResumed = ""
    onConnectionEstablished = ""
    onPlaybackEnded = ""
    onContextChanged = ""
    # Execute the command with `bash -c`
    executeWithBash = false
    onPlaybackPaused = ""
    onInactiveSession = ""
    onVolumeChanged = ""

### Time correction ###
[time]
    # Manual time correction in millis
    manualCorrection = 0
    # Time synchronization method (NTP, PING, MELODY, MANUAL)
    synchronizationMethod = "NTP"

### API ###
[api]
    # API port (`api` module only)
    port = 24879
    # API listen interface (`api` module only)
    host = "0.0.0.0"

### Player ###
[player]
    # Whether to apply the Spotify loudness normalisation
    enableNormalisation = true
    # Initial volume (0-65536)
    initialVolume = 65536
    # Whether librespot-java should ignore volume events, sink volume is set to the max
    bypassSinkVolume = false
    # Release mixer line after set delay (in seconds)
    releaseLineDelay = 20
    # Normalisation pregain in decibels (loud at +6, normal at +3, quiet at -5)
    normalisationPregain = 0.0
    # Output metadata in Shairport Sync format (https://github.com/mikebrady/shairport-sync-metadata-reader)
    metadataPipe = ""
    # Autoplay similar songs when your music ends
    autoplayEnabled = true
    # Preferred audio quality (NORMAL, HIGH, VERY_HIGH)
    preferredAudioQuality = "VORBIS_320"
    # Where librespot-java should search for local files
    localFilesPath = ""
    # Audio output device (MIXER, PIPE, STDOUT, CUSTOM)
    output = "PIPE"
    # Crossfade overlap time (in milliseconds)
    crossfadeDuration = 0
    # Audio output Java class name
    outputClass = ""
    # Whether the player should retry fetching a chuck if it fails
    retryOnChunkError = true
    # Mixer/backend search keywords (semicolon separated)
    mixerSearchKeywords = ""
    # Output raw (signed) PCM to this file (`player.output` must be PIPE)
    pipe = "/tmp/snapfifo"
    # Log available mixers
    logAvailableMixers = true
    # Number of volume notches
    volumeSteps = 64
基本的に編集してもらうところには【】をつけています。
しかしUbuntuだとなぜかなりませんでした。
ということでcat /dev/urandom > /tmp/snapfifoとしてみるとpermission deniedとでたので所有権がらみで音が出てないみたいでした。
てことでsudo chmod -t /tmpとしたら上手くいきました。
自分で自分のところのタブレットをいい感じにした話。
やっぱり宿泊施設にはタブレットがあっていろいろ出来たほうがカッコイイですよね。
けれどもいろいろとお金がかかります。
こういうのとか
こういうのとか。
でも月額〇〇円で、高いんですよ。大体全部月4万くらいかかる。
ということで作ることにしました。
てことで出来ました。
とりあえずできた!
— 草野 洋平 / 伊勢屋 (@kedako) 2021年10月4日
次は色んな所を遠隔で操作できるように、、しなくても十分だと思ってしまった。
これ以上は商売にしないと難しいのかも。 pic.twitter.com/kLn6NUfra4
Flutter製。Flutterは本当にわかりやすかったです。半年くらい勉強したらできるようになりました。
アプリだけではできないこととして
- 決まった時間に再起動
- ブラウザのキャッシュの消去
- 電源入れたら直接画面が表示されること
電源は各タブレットで使えるようにする方法が違うみたい。
ブラウザは
play.google.comDuckDuckGoのSettingsに自動キャッシュ消去の機能があってそれを利用しました。
電源オン→直起動
はAndroidの開発者向けセッティング→ロック画面を表示しない
でOKでした。
あとはGoogle Family Linkで、変なアプリを無理やり入れられないようにしたら出来上がりです。
結構頑張ったので、端末代含めて1台3万位で設定します。
GASでTuya APIにアクセスする 後編

前回から随分と間が空いてしまいましたが、GAS側のコードを掲載します。
やり方はTuyaからトークン取得→トークンを使ってコマンドを送る。
コマンドの種類やURLはTuya Developerの
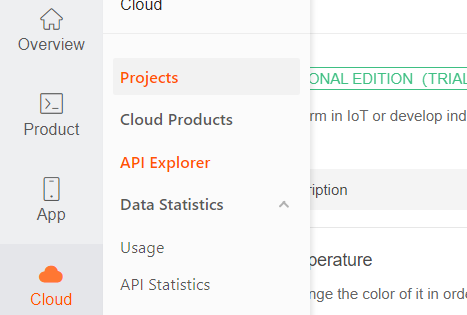
[Device Management] → [Get Device Details]

こちらにDevice Idを貼り付けてPOSTすると右側に出ている[category]がデバイスのカテゴリです。
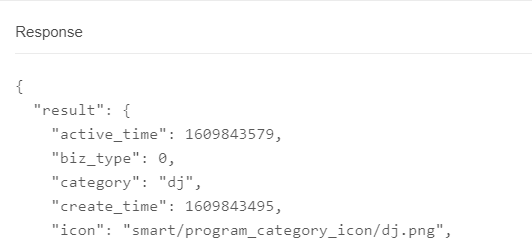
このカテゴリでデバイスのコマンドを探します。この場合は『dj』がカテゴリとなります。
[Cloud Development] →[Standard Instruction]
でカテゴリに応じたコマンドを見つけることができます。
あとは以下GASをコピペして利用して下さい。
最後にmain functionを実行すると思ったとおりの結果になると思います。
//TUYA API 設定 こちらに記載。
const clientId = "cliend_id";
const clientSecret = "client_secret";
const device_id = ["device_id"];

var url = "https://openapi.tuyacn.com/v1.0/token?grant_type=1";
var command_urls = device_id.map(
  (key) => `https://openapi.tuyacn.com/v1.0/devices/${key}/commands`
);

//コマンド。こちらはデバイスのカテゴリに応じて変更。
var tuya_command = {
  off: [{ code: "switch_led", value: false }],
  scene: [
    { code: "switch_led", value: true },
    { code: "scene_data_v2", value: { scene_num: 4 } },
  ],
};

function mainfunction() {
  setScene(tuya_command["off"]);
}

//ここから
function setScene(command) {
  var timeStamp = getTime().toString();

  var token = retreiveAccessToken(clientId, clientSecret, timeStamp, url);
  var sign = calcSignWithToken(clientId, token, clientSecret, timeStamp);
  var headers = {
    client_id: clientId,
    access_token: token,
    t: timeStamp,
    sign: sign,
    sign_method: "HMAC-SHA256",
    "Content-Type": "application/json",
  };

  var options = {
    method: "POST",
    headers: headers,
    payload: JSON.stringify({
      commands: command,
    }),
  };
  // Logger.log(`access_token: ${token}`);
  // Logger.log(`sign :${sign}`);
  // Logger.log(`timestamp:${timeStamp}`);
  res = command_urls.map((key) => UrlFetchApp.fetch(key, options));
  Logger.log(res);
}

function retreiveAccessToken(clientId, clientSecret, timeStamp, url) {
  var easy_sign = calcSign(clientId, clientSecret, timeStamp);
  var headers = {
    client_id: clientId,
    sign: easy_sign,
    t: timeStamp,
    sign_method: "HMAC-SHA256",
    // Authorization: `Bearer $clientSecret`,
  };

  var options = {
    method: "GET",
    headers: headers,
    payload: {},
  };

  res = UrlFetchApp.fetch(url, options);
  return JSON.parse(res).result.access_token;
}

function getTime() {
  var now = new Date().getTime();
  return now;
}

function calcSign(clientId, clientSecret, timeStamp) {
  var str = clientId + timeStamp;
  var hash = Utilities.computeHmacSha256Signature(str, clientSecret);
  var signature = hash.reduce(function (str, chr) {
    chr = (chr < 0 ? chr + 256 : chr).toString(16);
    return str + (chr.length == 1 ? "0" : "") + chr;
  }, "");
  return signature.toUpperCase();
}

function calcSignWithToken(clientId, accessToken, clientSecret, timeStamp) {
  var str = clientId + accessToken + timeStamp;
  var hash = Utilities.computeHmacSha256Signature(str, clientSecret);
  var signature = hash.reduce(function (str, chr) {
    chr = (chr < 0 ? chr + 256 : chr).toString(16);
    return str + (chr.length == 1 ? "0" : "") + chr;
  }, "");
  return signature.toUpperCase();
}
GASからTuya IoT Platformにアクセスする。 前半
以前の記事はこちら
tuyaのIOT Platformが使いやすくなっていたので一部変更をした。
Tuya IOT Platformの登録
- https://auth.tuya.com/ にアクセス → Sign Up
- 必要事項を埋めて登録
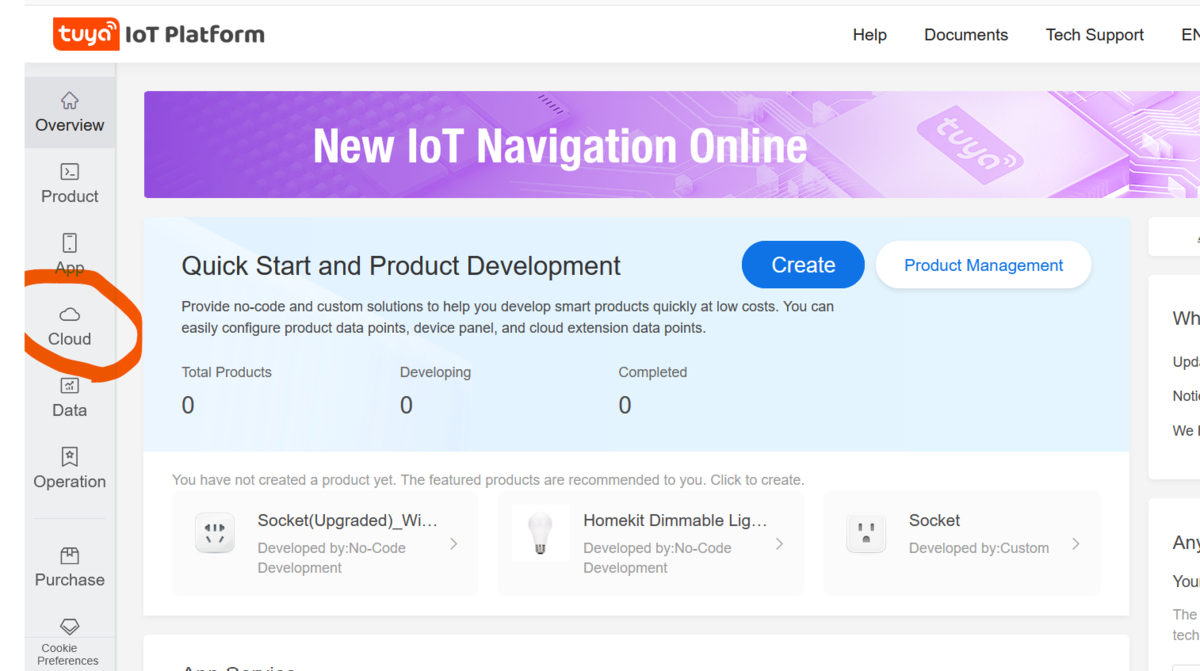
- 登録できたらCloud → アプリの作成
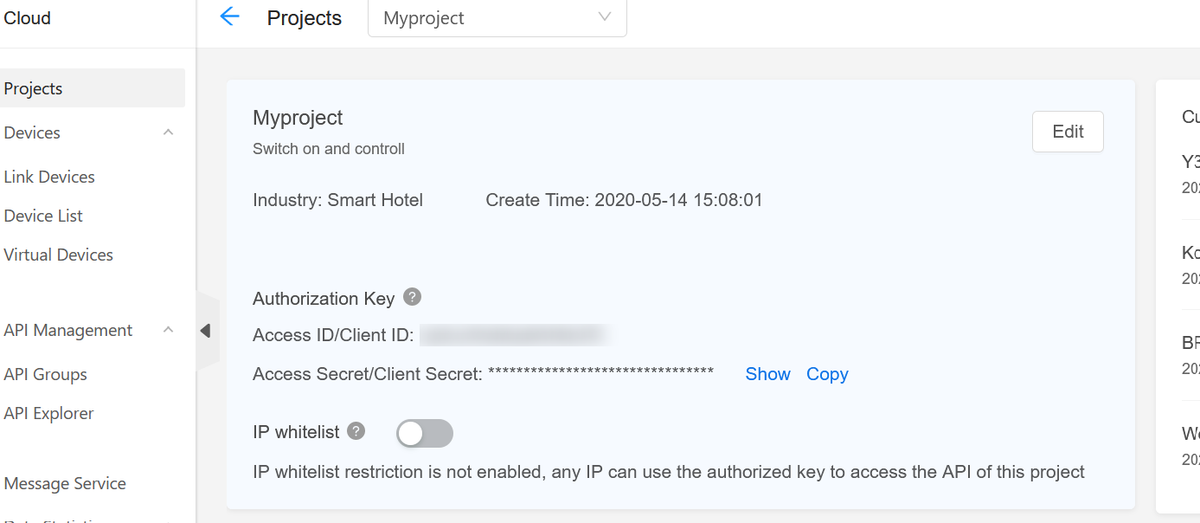
- Client IDとClient Secretが後ほど使うパラメーターです。

Raspberry PiでMultiroom Audio
Spotifyを家中で聞きたい・・家中を音楽で満たしたい・・・そう思ったことはありませんか?私はあります。
でもケーブルを家中に敷設するのは見た目も悪いし・・・そう思ったことはありませんか?私はあります。
てことでRaspberry Piを利用してMultiRoom Audioをしてみました。
全体的なイメージはこんな感じです。

順を追って行きます。
サーバー編
Snapcast Serverのインストール
バージョンなどはReleasesのページで適宜最新にして読み替えてください。
wget https://github.com/badaix/snapcast/releases/download/v0.21.0/snapserver_0.21.0-1_armhf.deb
sudo dpkg -i snapserver_0.21.0-1_armhf.deb
Raspotifyの設定
/etc/default/raspotify を編集します。
sudo nano /etc/default/raspotify
# /etc/default/raspotify -- Arguments/configuration for librespot

# Device name on Spotify Connect
DEVICE_NAME="<好きな名前(日本語可)>"

# Bitrate, one of 96 (low quality), 160 (default quality), or 320 (high quality)
BITRATE="320"

# Additional command line arguments for librespot can be set below.
# See `librespot -h` for more info. Make sure whatever arguments you specify
# aren't already covered by other variables in this file. (See the daemon's
# config at `/lib/systemd/system/raspotify.service` for more technical details.)
#
# To make your device visible on Spotify Connect across the Internet add your
# username and password which can be set via "Set device password", on your
# account settings, use `--username` and `--password`.
#
# To choose a different output device (ie a USB audio dongle or HDMI audio out),
# use `--device` with something like `--device hw:0,1`. Your mileage may vary.
#
OPTIONS="--username <SPOTIFYのユーザーネーム> --password <SPOTIFYのパスワード> --zeroconf-port 65444"

# Uncomment to use a cache for downloaded audio files. Cache is disabled by
# default. It's best to leave this as-is if you want to use it, since
# permissions are properly set on the directory `/var/cache/raspotify'.
#CACHE_ARGS="--cache /var/cache/raspotify"

# By default, the volume normalization is enabled, add alternative volume
# arguments here if you'd like, but these should be fine.
#VOLUME_ARGS="--enable-volume-normalisation --linear-volume --initial-volume=100"

# Backend could be set to pipe here, but it's for very advanced use cases of
# librespot, so you shouldn't need to change this under normal circumstances.
BACKEND_ARGS="--backend pipe --device /tmp/snapfifo"
必要なのはDEVICE NAME、OPTIONS、BACKEND_ARGSの3つ
OPTIONSには開放するポート番号を--zeroconf-port以降に、
BACKEND_ARGSにはパイプを指定してあげましょう。
Snapcast Serverの設定
/etc/default/snapserver を編集しますが、今回は特に必要ありません。
sudo nano /etc/default/snapserver
次にサンプルレートを変更しましょう
サンプルレートは`/etc/snapserver.conf`で変更できます。
[stream]セクションに置くみたいです。
source = pipe:///tmp/snapfifo?name=default
sampleformat = 44100:16:2
それぞれ設定した後は再読込しておきましょう。
sudo service snapserver restart
sudo service raspotify restart
クライアント側のラズパイの設定
snapclientのインストール
wget https://github.com/badaix/snapcast/releases/download/v0.21.0/snapclient_0.21.0-1_armhf.deb
sudo dpkg -i snapclient_0.21.0-1_armhf.deb
Snapcast Clientの設定
/etc/default/snapclientの設定
sudo nano /etc/default/snapclient
START_SNAPCLIENT=true SNAPCLIENT_OPTS="--host"
hostにはサーバーのIPアドレスを指定してください。
Snapclientのリスタート
sudo service snapclient restart
